(WPF)要素のスクリーンキャプチャーを保存するTriggerActionを作る
WPFで画面上の要素をキャプチャーして画像ファイルとして保存するような要件がワリとありますが、どうせならTriggerActionで作られたプロダクトは無いかなーと思って探してみたところ、すぐには見つからなかったので自作してみました。
以下、今回の開発環境です。
WPFでスクリーンキャプチャーを保存する方法は色々ありますが、今回は以下のページを参考にさせていただきました。
これをTriggerActionで実装してみた結果がこちら
<CaptureAciton.cs>
namespace CaptureTriggerSample.TriggerActions
{
    using System;
    using System.IO;
    using System.Windows;
    using System.Windows.Interactivity;
    using System.Windows.Media;
    using System.Windows.Media.Imaging;

    public class CaptureAction : TriggerAction<FrameworkElement>
    {
        public static readonly DependencyProperty FileNameProperty =
                DependencyProperty.Register("FileName"
                                            , typeof(string)
                                            , typeof(CaptureAction)
                                            , new FrameworkPropertyMetadata(null));

        public string FileName
        {
            get => (string)GetValue(FileNameProperty);
            set => SetValue(FileNameProperty, value);
        }

        protected override void Invoke(object parameter)
        {
            Rect bounds = VisualTreeHelper.GetDescendantBounds(AssociatedObject);
            DrawingVisual drawingVisual = new DrawingVisual();
            using (DrawingContext drawingContext = drawingVisual.RenderOpen())
            {
                VisualBrush visualBrush = new VisualBrush(AssociatedObject);
                drawingContext.DrawRectangle(visualBrush, null, bounds);
            }

            RenderTargetBitmap renderTargetBitmap =
                    new RenderTargetBitmap((int)bounds.Width, (int)bounds.Height, 96, 96, PixelFormats.Pbgra32);
            renderTargetBitmap.Render(drawingVisual);
            renderTargetBitmap.Freeze();

            PngBitmapEncoder png = new PngBitmapEncoder();
            BitmapFrame bitmapFrame = BitmapFrame.Create(renderTargetBitmap);
            bitmapFrame.Freeze();
            png.Frames.Add(bitmapFrame);
            using (FileStream fileStream = File.Create(FileName))
            {
                png.Save(fileStream);
            }

            MessageBox.Show($"キャプチャーを保存しました{Environment.NewLine}"
                            + $"[ファイル名]{Environment.NewLine}"
                            + $" {FileName}"
                            , "キャプチャー"
                            , MessageBoxButton.OK
                            , MessageBoxImage.Information);
        }
    }
}
※ブログ用に可読性を考慮してエラー処理などはしていません。
FileName プロパティに出力するファイル名を指定できるようにしています。
これを使うにはこのようにします。
<MainWindow.xaml>
<Window
    x:Class="CaptureTriggerSample.MainWindow"
    xmlns="http://schemas.microsoft.com/winfx/2006/xaml/presentation"
    xmlns:x="http://schemas.microsoft.com/winfx/2006/xaml"
    xmlns:d="http://schemas.microsoft.com/expression/blend/2008"
    xmlns:i="http://schemas.microsoft.com/expression/2010/interactivity"
    xmlns:local="clr-namespace:CaptureTriggerSample"
    xmlns:mc="http://schemas.openxmlformats.org/markup-compatibility/2006"
    xmlns:triggerActions="clr-namespace:CaptureTriggerSample.TriggerActions"
    Title="MainWindow"
    Width="525"
    Height="350"
    mc:Ignorable="d">
    <i:Interaction.Triggers>
        <i:EventTrigger EventName="Click" SourceObject="{Binding ElementName=CaptureButton}">
            <triggerActions:CaptureAction FileName="Resources\Capture.png" />
        </i:EventTrigger>
    </i:Interaction.Triggers>
    <Grid x:Name="LayoutRoot">
        <Grid.RowDefinitions>
            <RowDefinition Height="Auto" />
            <RowDefinition Height="*" />
        </Grid.RowDefinitions>
        <Button
            x:Name="CaptureButton"
            Grid.Row="0"
            Margin="8"
            Padding="16,8"
            HorizontalAlignment="Left"
            Content="Capture" />
        <Grid Grid.Row="1" Margin="8">
            <Grid.RowDefinitions>
                <RowDefinition Height="Auto" />
                <RowDefinition Height="Auto" />
            </Grid.RowDefinitions>
            <TextBox x:Name="TextBox" />
            <TextBlock
                Grid.Row="1"
                Margin="0,8"
                Text="{Binding Text, ElementName=TextBox, Mode=OneWay}" />
        </Grid>
    </Grid>
</Window>
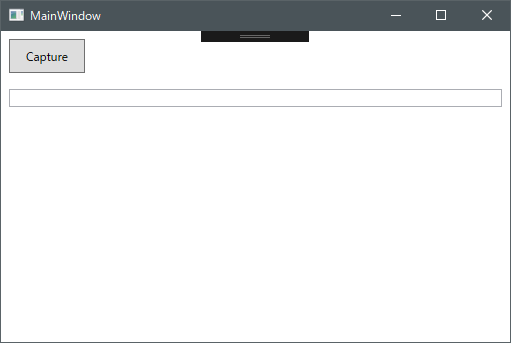
これを実行すると以下のような画面が表示されます。

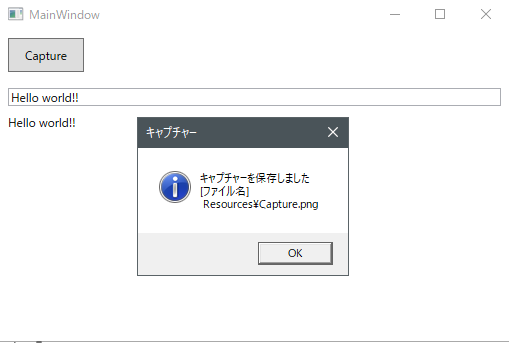
CaptureボタンをクリックするとWindow要素のキャプチャーが実行されます。
(実行フォルダに"Resources"フォルダを作成する必要があります。)

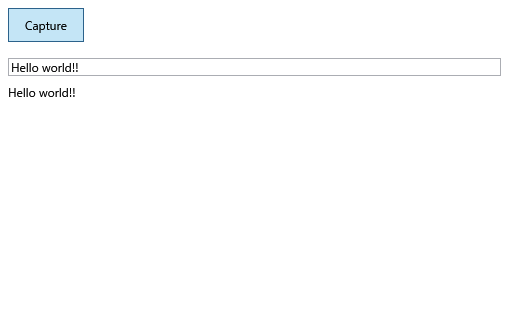
実際にキャプチャーされた画像ファイルはこちら。

このように簡単に指定した領域をキャプチャーすることが可能です。
TriggerActionにしたことにより、例えばKeyTrigger を使ってCtrl + Cキー入力時にキャプチャーを保存したりすることも可能です。
ただし、1点注意することがあります。
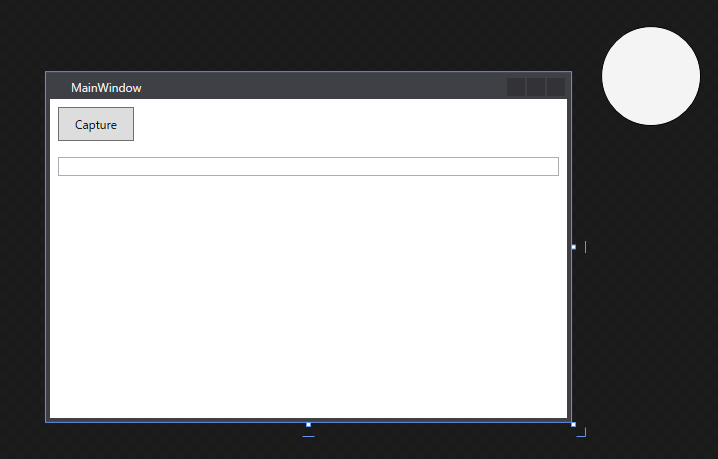
レアケースだとは思いますが、以下の様にキャプチャー対象の要素の外側にも子要素が配置されている場合、子要素を含む領域がキャプチャーされてしまいます。
以下はVisual Studio のXAMLデザイナープレビューです。
右上にEllipseを配置していますが、Grid の領域外に配置しています。

これをキャプチャーすると以下の様になります。

原因はここ
Rect bounds = VisualTreeHelper.GetDescendantBounds(AssociatedObject);
VisualTreeHelper.GetDescendantBounds は指定したビジュアル要素の全ての子要素の和集合から領域を算出します。
つまり、AssociatedObject の子要素が配置された領域全てがその対象となります。(ただし原点はあくまでAssociatedObject を基準とする。)
これを回避するには、AssociatedObject もしくはその子要素にClipToBounds="True" を設定します。
こうすることで要素の範囲外にあるものはキャプチャーされなくなります。
画面領域外にコントロールを配置することってあんまりないと思うのですが、移動アニメーション中などに予期せずキャプチャー範囲が期待したもので無くなることはあり得るので注意が必要です。
今回使用したサンプルはこちら↓↓↓↓
github.com